You can never have enough pillow cases. They are fast to make and a fun way to change up a bedroom for a kiddo or yourself! I made some pillow cases to match a quilt the sewing ladies at my church are making for a gift. While I was working my daughter spied some fabric in my stash that she was keen on having be hers. I find this hilarious because when I purchased the fabric she claimed she did not like it. It’s amazing what 2 years of cold storage can do for the popularity of items in my strong willed child’s eyes.

crude sketch of measurements.
Since I’ll need to do this again, I want to get my thoughts down where I could find them easily. I started by measuring a pillow case I had in the closet. If I were sewing it all on my regular machine I’d add 0.5″ for the inseam, or another 0.25″ to what I’ve outlined to the right. Since I bought a serger from one of the sewing ladies and I only need to leave 0.25″ for it’s stitch.
For the main body of the pillowcase I used a piece of fabric that was 40 3/4″ by 26″.
The cuff of the case was 40 3/4″ by 8.5″. I also used a bit of flat lace that was 40 3/4″ long.
I started by turning the right sides of the larger piece together so it made a 26×20 3/8″ rectangle. I serged down one short side and then the longer one of the rectangle so a short side was left open.

showing the wrong side of the cuff with the lace basted on and then stitched in a loop.

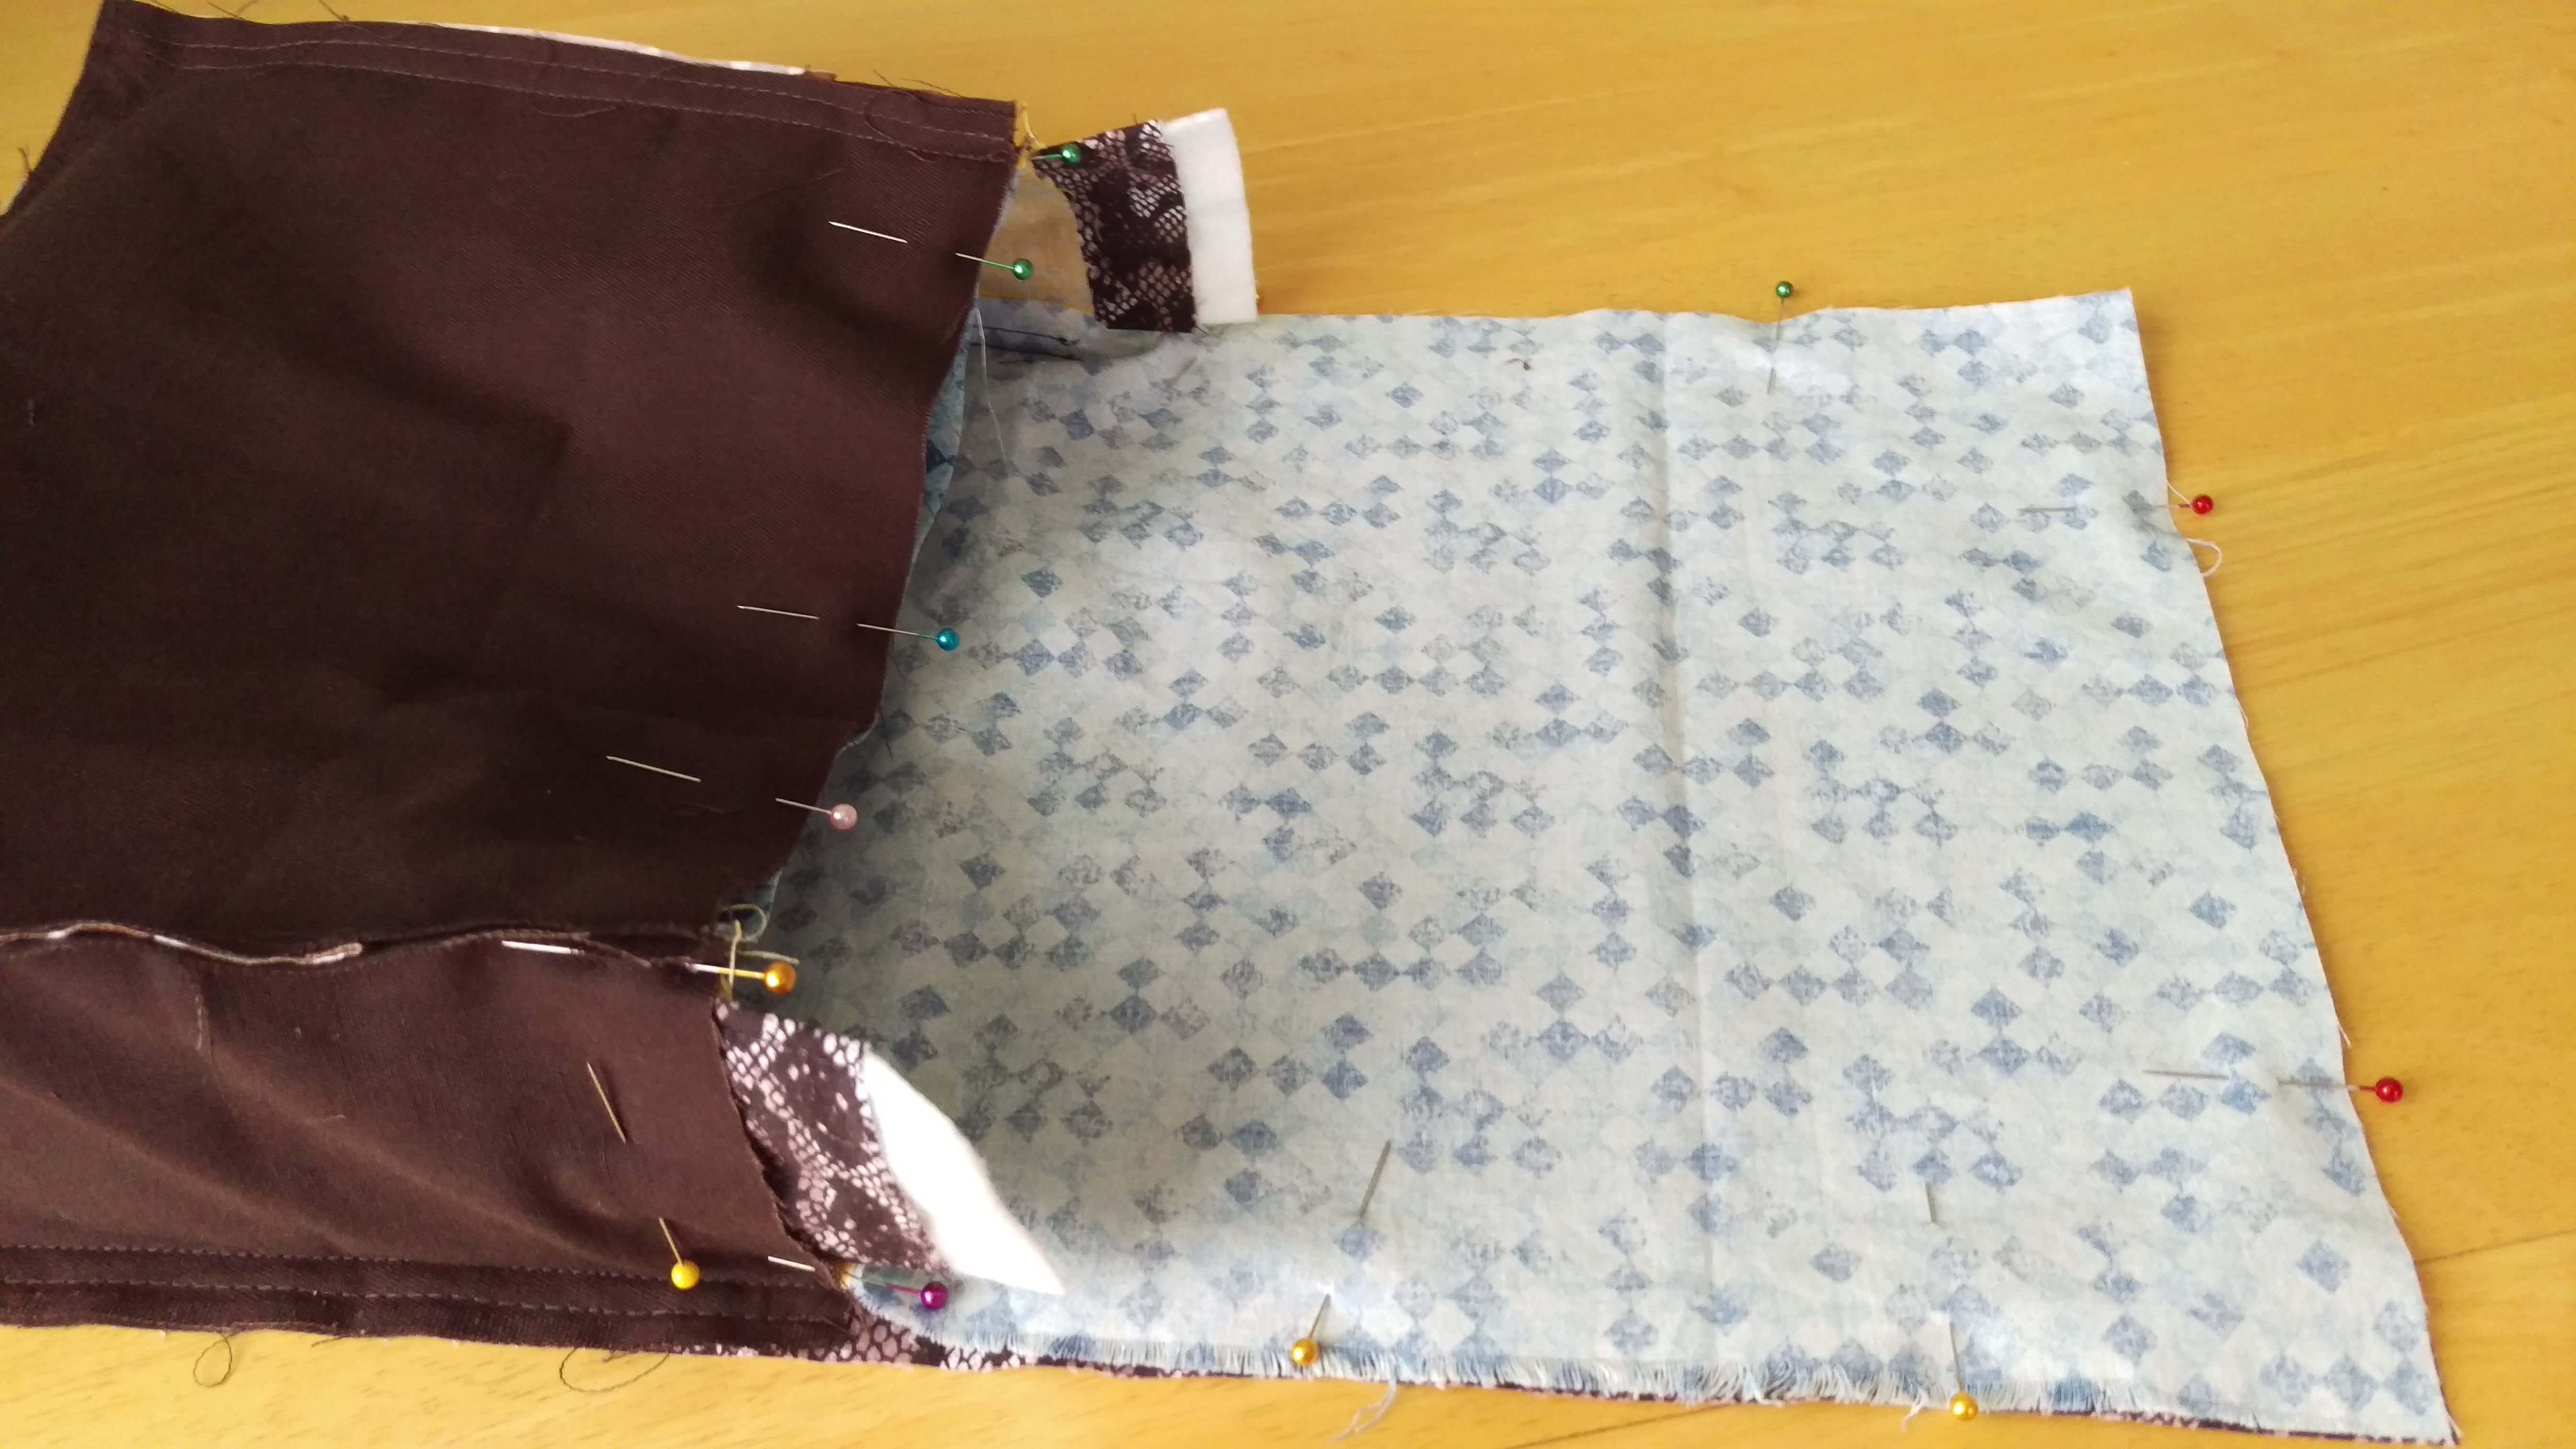
The cuff pinned onto the case.
I basted the lace onto the right side of the cuff fabric. I only wanted 1/8 of the lace under the 0.25″ seam, so I basted it on 1/8″ from the edge, with the fancy side pointing towards the majority of the fabric.
After basting on the lace, fold the fabric, right sides together so your piece is now 8.5″ x 20 3/8″. Sew the fabric along the 8.5″ side. Press the seam to the side.
Fold the loop of cuff fabric right sides out so now it is 4.25″ x 20 3/8″ with the lace on the inside of the loop. Iron it flat.
Turn the case right side out.
Put the cuff loop around the outside of the case. The lace should be next to the right side of the case fabric. Line up all the raw edges and seams. Pin them to keep them together properly. Stitch it up!
Finish up the case by ironing it. Press all the seams away from the cuff and toward the case. Adding a top stitch here would look nice too, but my machine is destined for maintenance and not stitching nicely. 🙁
Ta da! Well done. Everyone is happy. The Girl loves her Pink Princess Toile pillow case.

Little enjoying her new pillow case.
Save
Save

 While I don’t especial love V-day, I do love crafting. V-day is an excellent excuse to craft. Last year we came up with a super cute valentine idea for my son to take to his classmates.